Popular YouTuber and former NASA engineer Mark Rober spent $5 million of his own money to launch a satellite into space that can capture “the most epic selfies in the Universe.”

Popular YouTuber and former NASA engineer Mark Rober spent $5 million of his own money to launch a satellite into space that can capture “the most epic selfies in the Universe.”

Japanese photographers are getting a gorgeous new Lumix S9 camera next month. The “Titanium Gold” Lumix S9 camera features a new three-layer paint process, which Panasonic promises is more distinctive and eye-catching than conventional metallic paint.

Edward Burtynsky has been photographing human industry for decades and a new show focuses on China’s evolving role in global manufacturing.

This is the first-ever photograph of the Upemba lechwe — one of the world’s rarest large mammals, now teetering on the brink of extinction, with fewer than 100 of these elusive creatures believed to remain.

The widely published choke-gesture photo from the NBA playoffs showcases the enduring power of a single image to capture and ignite sports passion. In this case, the photographer had line of sight for a second to make the photo.
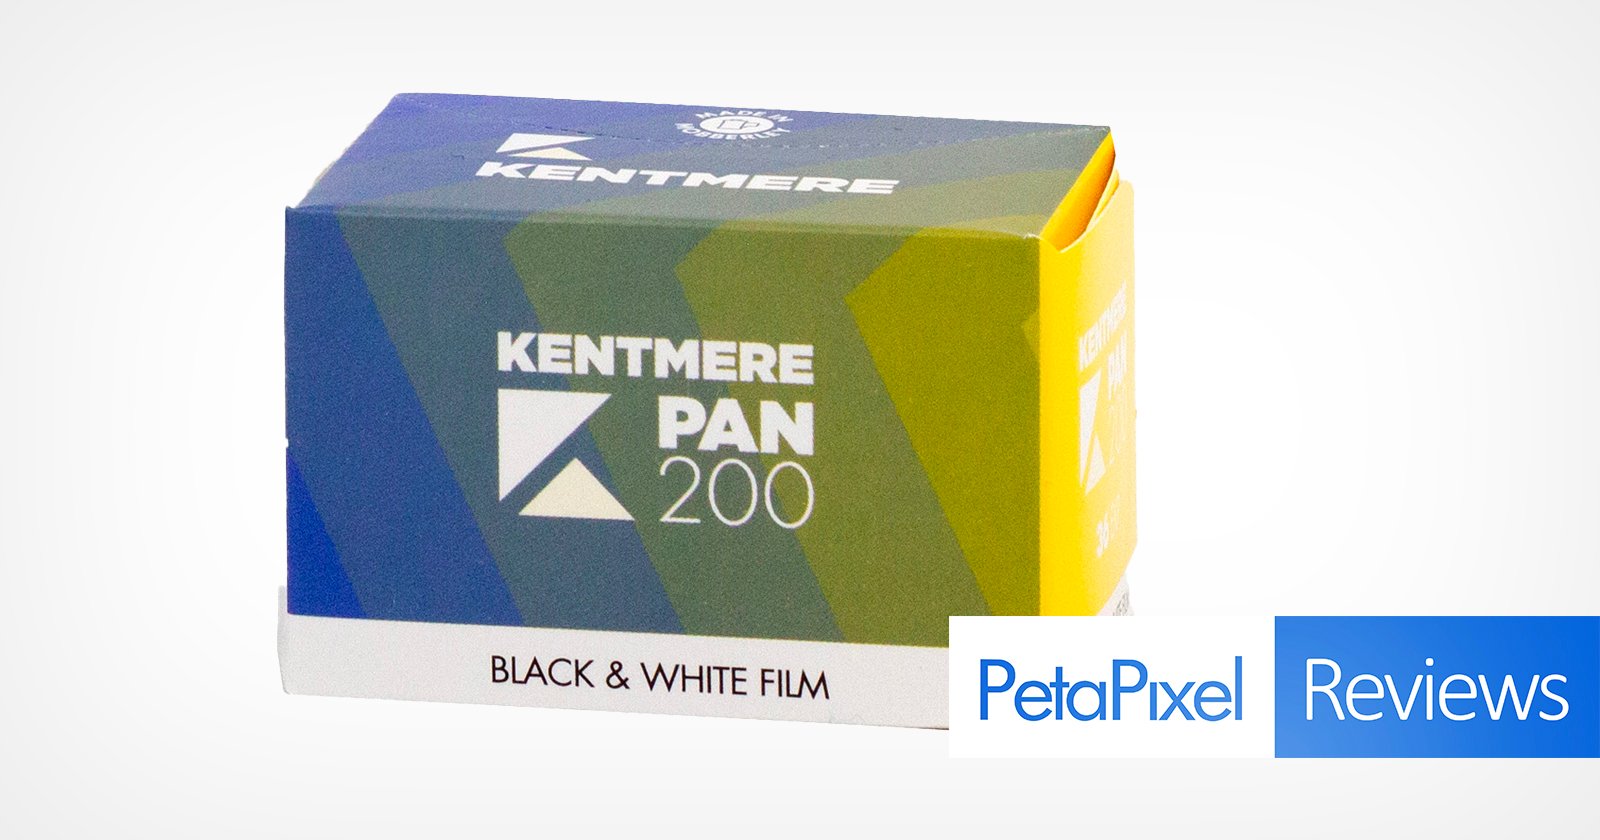
Being a film photographer is an expensive hobby. Sure, it’s easy to get started with the relatively low cost of hardware but film and developing costs (even if you’re doing it yourself) add up fast. That’s why Kentmere Pan 200 is so welcome: it’s good, it’s readily available, and it’s cheap at $8 per roll.
It’s time for some belated spring cleaning if you waste time struggling with a disorganized Lightroom catalog that’s difficult navigate. If you’ve skipped this one-time housekeeping task because it requires a bit of thought and effort, think about all the frustration you’ll avoid by having all your images at your fingertips in logical folders where they’re easy to find.
Instructor Austin James Jackson says that “most photographers don’t have the best habits when organizing their catalogs and, unfortunately, this is one of the last things they consider when learning to use Lightroom.” His goal for today is to demonstrate how he increases efficiency and speed by doing things right.

We refer to this as a one-and-done process because once you’ve established a clean framework that works best for you, keeping track of future additions to the library will be a piece of cake. The lesson also discusses the implications of working with an external drive, and the benefits of converting image files to the standardized DNG format.
There’s also a few timesaving tricks for importing photographs to a new Lightroom catalog. The entire process is far easier to follow by listening to Jackson with his illustrations on the screen, so we’ll forgo our usual overview and let the expert demonstrate the best way to clean up your act.

Jackson’s instructional YouTube channel is full of shooting techniques for landscape photographers, along with post-processing advice that’s appropriate for beginners and experienced Lightroom users alike.
And be sure to watch the tutorial we featured recently with another popular image-editing instructor who demonstrates how to use Lightroom’s Generative Fill capabilities to clean up his photographs and eliminate unwanted objects and other distracting artifacts.
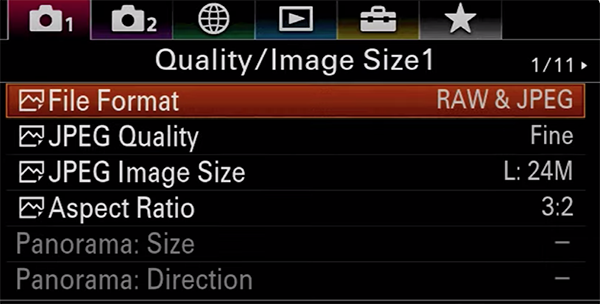
All cameras feature a selection of Drive Modes, whether your weapon of choice is a DSLR, mirrorless model, or a full-featured compact. Choosing the appropriate setting for the task at hand will simplify a shoot and increase your odds of success.
Instructor Benjamin Jaworskyj is a self-taught German photographer and adventurer whose basic tutorials take you behind the scenes as he demonstrates simple techniques that shooters of all skill levels can employ to elevate their skills. By the time this nine-minute episode concludes you’ll approach the topic with confidence and know when and how to use Single mode, one of the Burst settings, and even one of the two Self-Timer options.
Ben begins with the Single mode which is the setting most photographers use. Simply focus on your subject and capture the shot. This mode works well for landscapes, environmental portraits, and other situations when there’s no movement within the frame.

The Continuous mode, on the other hand, is a better choice when photographing subjects in motion, like birds in flight, wildlife on the ground, and a variety of fast-moving action-sports images. In this case the camera will typically offer of choice of three burst settings—Low, High, and High+. Keep in mind that the nomenclature varies from one camera to another.
Ben explains that when one of the Burst modes is selected, the camera will keep shooting at the chosen rate until you remove your finger from the shutter button or the camera empties its buffer. The speed of the buffering process depends upon the camera in use and whether you’re shooting Jpegs, Raw Files, or Jpeg and Raw.
Another consideration of note is the speed rating of your memory card, and this is super important when shooting at the highest burst rate or when making videos. There are a few other details to keep in mind—just follow Ben’s advice.

The video concludes with an overview of your camera’s Self-Timer settings, because these also fall under the category of drive modes. And there are usually two options: the two-second default and another with a 10-second delay.
Ben’s instructional YouTube channel is a great source of information, especially for beginning photographers who will benefit by learning the basics.
We also suggest watching another straightforward primer we featured recently that demystifies lens focal length and explains why there’s more to this concept than just magnification.
![]()
The most advanced mobile photography features are a trickle-down affair where some end up being part of mid-range and affordable phones. That’s been Google’s Pixel A series in a nutshell, only in the case of the Pixel 9a, it also applies to the AI-driven tools that play a key role in the broader imaging package.
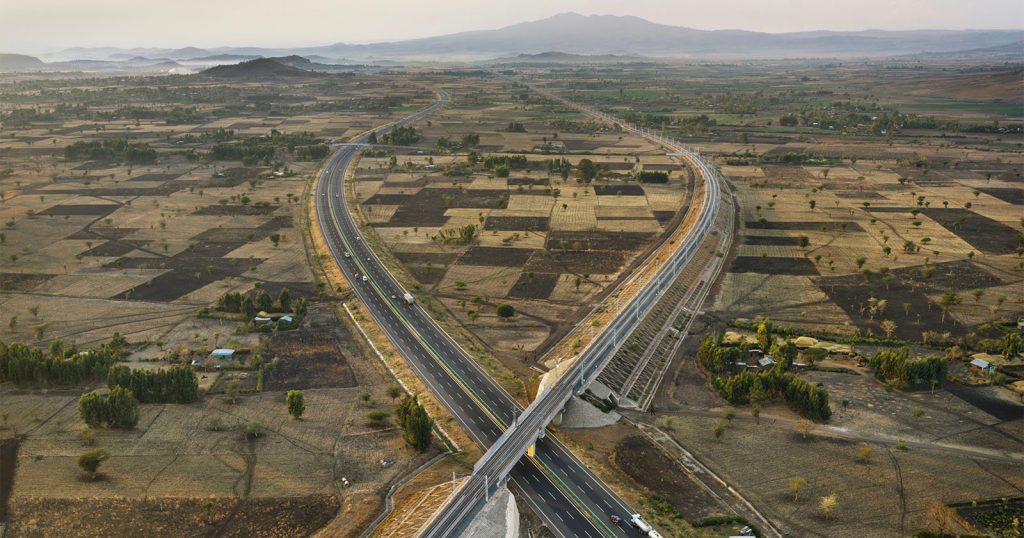
Travel photography is an interesting genre that borrows techniques from street photography and portraiture, along with best practices for capturing landscape and seascape imagery. Yet, we often do things a bit differently, because there’s the added goal of documenting a trip with memorable moments that tell a story.
Instructor Belinda Shi is an experienced shooter who’s traveled across six contents capturing over a million images in the past 18 years, so she has plenty of knowledge and great photos to share. She kicks today’s tutorial with this: “I’ll explain seven practical travel photography tips that will help you capture compelling stories and authentic moments during your travels.”
The discussion covers a wide-range of essential skills, like mastering different types of light for various purposes, the importance of imbuing your images with harmonious local colors, a thoughtful approach to composition, and the mindset needed for capturing long-lasting memories to share with family and friends.

She begins with harnessing the fundamentals of light, and why it’s necessary to take one approach when shooting environmental portrait, for example, and employing a different approach for urban landscape scenes and other types of photos. As she says, “it’s crucial to understand what kind of light works best for specific subjects.”
Shi then demonstrates how to deal with featureless skies that add nothing to the story you’re trying to tell. She puts it like this, “One composition mistake I constantly see is too much empty sky taking up too much valuable real estate within thee frame.” Her solution is to accentuate the key elements of your shot by minimizing flat, boring skies.
There’s also a discussion of gear, sensor size, and important camera settings, and one of Shi’s recommendations is to employ the camera’s burst mode both strategically and sparingly. She insists that high burst rates are rarely necessary for travel photography, and they’ll just fill up your memory card force you to spend time culling hundreds of similar images or even more.

The lesson proceeds with Shi’s tips for getting it right in the camera, and why she advises you to “capture a story not just faces.” There’s also a helpful discussion of how to put the important concept of color harmony to work. You can even join her masterclass for free with a link in the description beneath the video.
This is a lesson you won’t want to miss, especially if there’s a summer vacation on your itinerary. Once you’re done watching be sure to take a quick trip today by visiting Shi’s popular YouTube channel for photographers on the go.
And be sure to check out the earlier tutorial we shared in which an experienced pro explains “how to see light the way your camera does.”